When the temperature soars or plummets unexpectedly, and your heating, ventilation, and air conditioning (HVAC) system fails to respond as it should, it can be a source of considerable discomfort and stress. While waiting for professional help can be an uncertain and anxious time, there are several quick fixes you can implement to temporarily alleviate the situation and restore some level of comfort until the experts arrive. Understanding these simple troubleshooting steps not only empowers homeowners but also can save time and, potentially, money.
In this article, we will explore various quick fixes that can be performed without specialized tools or technical expertise. From minor adjustments to filters and thermostats to assessing airflow issues and detecting common problems, these proactive measures can help mitigate the situation. We will emphasize the importance of safety and provide guidance on when it’s absolutely necessary to turn off your system to prevent further issues. By familiarizing yourself with these immediate solutions, you can take charge of the situation and ensure that your home remains as comfortable as possible while waiting for a professional HVAC technician.
Whether you are dealing with an air conditioning unit that isn’t cooling or a heating system that refuses to warm your home, having a toolkit of quick fixes at your disposal can make all the difference. Our goal is to equip you with practical insights and actionable steps that not only provide immediate relief but also help you better communicate with your HVAC professionals when they come to diagnose and fix the underlying issues. So, let’s delve into the most effective quick fixes that any homeowner can implement before the HVAC technician arrives.
Basic Troubleshooting Steps
When your HVAC system experiences issues, it can be tempting to call for professional help immediately. However, there are several basic troubleshooting steps you can take before reaching out to an expert. Understanding these steps can save you time and potentially reduce the cost of unnecessary service calls.
The first step involves checking your thermostat settings. Ensure that your thermostat is set to the correct mode—whether heating or cooling—and that it is set to an appropriate temperature. Sometimes, a simple adjustment can resolve a problem. Next, inspect the power supply to the HVAC unit. Check that the unit is plugged in and that any circuit breakers or fuses related to the system are not tripped or blown. If there have been any power surges, resetting the breakers may be all that is needed to restore function.
Another crucial step in troubleshooting is to provide a visual inspection of the HVAC unit and surrounding areas. Look for debris, leaves, or obstructions around the outdoor condenser unit. Clearing these obstructions can significantly improve the efficiency of your system. Additionally, check for unusual sounds coming from the system, which might indicate specific problems, or whether there are any noticeable leaks near the vents or ducts.
If you notice that your system is blowing warm air when it should be cooling, or the humidity levels in your home are soaring, checking the air filters can also be a quick fix. Clogged or dirty air filters can restrict airflow, causing the system to work less efficiently or even to shut down. Replacing or cleaning the filters is something homeowners can often do themselves, leading to immediate improvement in air quality and comfort.
Understand, these troubleshooting steps are not a substitute for professional HVAC support, especially if the problem persists. However, by performing these basic checks, you can often resolve minor issues quickly and effectively, ensuring a more efficient and comfortable living environment until professional help can assess your HVAC system comprehensively.
Air Filter Maintenance
Air filter maintenance is an essential aspect of HVAC system upkeep that can greatly influence the efficiency and longevity of your heating and cooling systems. The air filter is designed to capture dust, dirt, and airborne particles, preventing them from circulating throughout your home. Over time, these filters can become clogged, restricting airflow and leading to increased energy consumption. Regularly checking and replacing your air filters every one to three months, depending on usage and the type of filter, can help maintain optimal system performance.
Before professional HVAC help arrives, there are a few quick fixes you can implement to address air filter issues. First, visually inspect the filter to determine if it’s dirty or has visible blockages. If so, replace it with a new filter that matches the specifications of your HVAC system. If a replacement is not immediately available, you can try to temporarily clean the filter if it is washable and reuse it until a new filter can be obtained. Another quick fix is to check the filter’s placement to ensure it is properly seated within the filter holder, as improper installation can lead to gaps that allow unfiltered air to bypass the filter.
Moreover, if you notice a significant decrease in airflow or a spike in energy bills, these could also signal that your air filter needs attention. Keeping your air filter clean not only promotes a healthy indoor environment but also helps your HVAC system operate smoothly, minimizing the risk of unexpected breakdowns. By maintaining this seemingly small but crucial component, you can significantly enhance the overall functionality and efficiency of your HVAC system until your technician can pay a visit for more in-depth maintenance or repairs.
Thermostat Checks and Adjustments
When it comes to maintaining the efficiency and functionality of your HVAC system, ensuring that the thermostat is operating correctly is crucial. The thermostat serves as the command center for your heating and cooling systems, making it essential for it to be in proper working order. Before seeking professional help, there are several quick fixes you can implement to troubleshoot and optimize your thermostat’s performance.
First, begin by checking the temperature settings on your thermostat. Sometimes, a simple adjustment can rectify the situation. Ensure that the thermostat is set to “cool” or “heat” as needed and that the desired temperature is appropriately set. Additionally, confirm that it’s in “auto” mode rather than “on,” which can cause the system to run continuously, leading to inefficient energy use.
Another important aspect to examine is the thermostat’s placement. It should be installed away from direct sunlight, drafts, or heat sources, as these factors can mislead the temperature readings and cause the system to misbehave. If it seems out of place or is affected by environmental factors, relocating it may help achieve better accuracy.
Battery-operated thermostats also require attention; dead batteries can prevent the thermostat from functioning correctly. If your thermostat has a digital display, check if it dims or turns off, indicating that the batteries may need to be replaced. If you notice that the display is functioning normally, it may also be helpful to reset the thermostat by turning it off and back on, which can sometimes resolve minor glitches.
If adjustments and checks don’t resolve the issue, you should consider inspecting the wiring. Ensure all connections are tight and intact. Loose or damaged wires can impact performance and should be addressed with caution. If you’re uncomfortable making these checks or believe there’s a deeper issue, it’s best to wait for professional HVAC help to assess and rectify the situation safely.
By systematically checking your thermostat and addressing these common issues, you can often identify and resolve problems without immediate reliance on professional services. However, if the issues persist after these quick fixes, seeking professional help is advisable to ensure long-term comfort and efficiency in your HVAC system.
Inspecting Vents and Ducts
When it comes to ensuring optimal HVAC efficiency, one of the most critical steps involves inspecting vents and ducts within your home. These components play a significant role in the distribution of heated or cooled air, and any issues with them can lead to reduced performance and high energy bills. Regular inspection enables homeowners to identify blockages, leaks, or damage that could hinder airflow and efficiency.
Start by checking your vents for any visible obstructions. Furniture, curtains, or any other items that might be blocking airflow can significantly impact how well your HVAC system functions. Ensure that all vents are open and unobstructed to allow free air distribution throughout the home. Similarly, inspect the ducts for visible signs of damage, such as holes or disconnected sections, that could result in air leakage. If you find any issues, tape or duct mastic can be used as temporary fixes until a professional can assess and repair them properly.
Another crucial aspect to consider is the cleanliness of the ducts. Dust and debris can accumulate over time, obstructing airflow and potentially contributing to indoor air quality issues. If you’re up for it, you might consider using a vacuum with a hose attachment to clean out easily accessible duct areas or use a brush to gently dislodge any built-up residue. However, it’s important to note that extensive duct cleaning should be left to professionals, as they have the tools and expertise to do so without damaging the system.
While these quick fixes can provide immediate relief and improved airflow, it’s vital to remember that they are only temporary solutions. A comprehensive inspection and maintenance schedule by an HVAC professional should follow any DIY fixes to ensure the longevity and efficiency of the system.
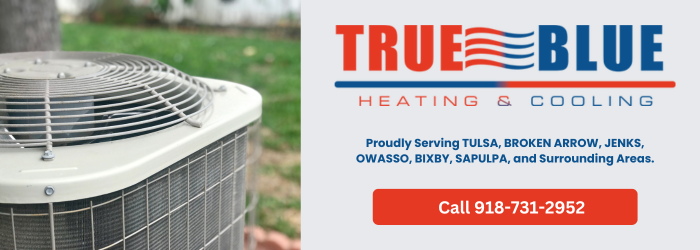
Condenser Unit Care and Cleaning
The condenser unit is a critical component of your HVAC system, playing a key role in the cooling process. Located outside your home, it is responsible for dissipating heat absorbed from your indoor air. Regular care and cleaning of the condenser unit can help ensure its optimal performance and longevity. Debris, such as leaves, dirt, and grass clippings, can accumulate around the unit, reducing airflow and forcing it to work harder than necessary, which can lead to breakdowns and increased energy costs.
To maintain your condenser unit, begin by ensuring it is free from obstructions. Clear away any debris within a two-foot radius around the unit, allowing for adequate airflow. You should also inspect the fins on the condenser for bend or damage, as these fins help facilitate air movement. If they are bent, gently straighten them using a fin comb or a flat object. Additionally, consider hosing down the unit to remove built-up dirt and grime. This cleaning process is especially important before the onset of the heating or cooling season, as a clean unit can significantly enhance efficiency.
Before professional help arrives for any significant issues with your HVAC system, there are several quick fixes you can implement to potentially alleviate minor problems. First, ensure that your thermostat is set to the desired temperature and functioning properly. Sometimes a simple adjustment or a new battery can resolve operational issues. Check that the air filter is clean; a clogged filter can restrict airflow and decrease efficiency. If you haven’t changed your filter in a while, replace it to see if that makes a difference in system performance.
In addition to these steps, inspect all vents and registers to ensure they are open and unobstructed. Furniture, rugs, or other objects can inadvertently block airflow, leading to uneven heating or cooling in the home. Lastly, if your condenser is running but the airflow is weak, you can temporarily try to cool off the unit by spraying water on the coils, which can alleviate some strain until a technician can diagnose the underlying problem. Implementing these quick fixes can help troubleshoot minor issues while waiting for professional HVAC assistance, potentially improving comfort and efficiency in your home.